Trending

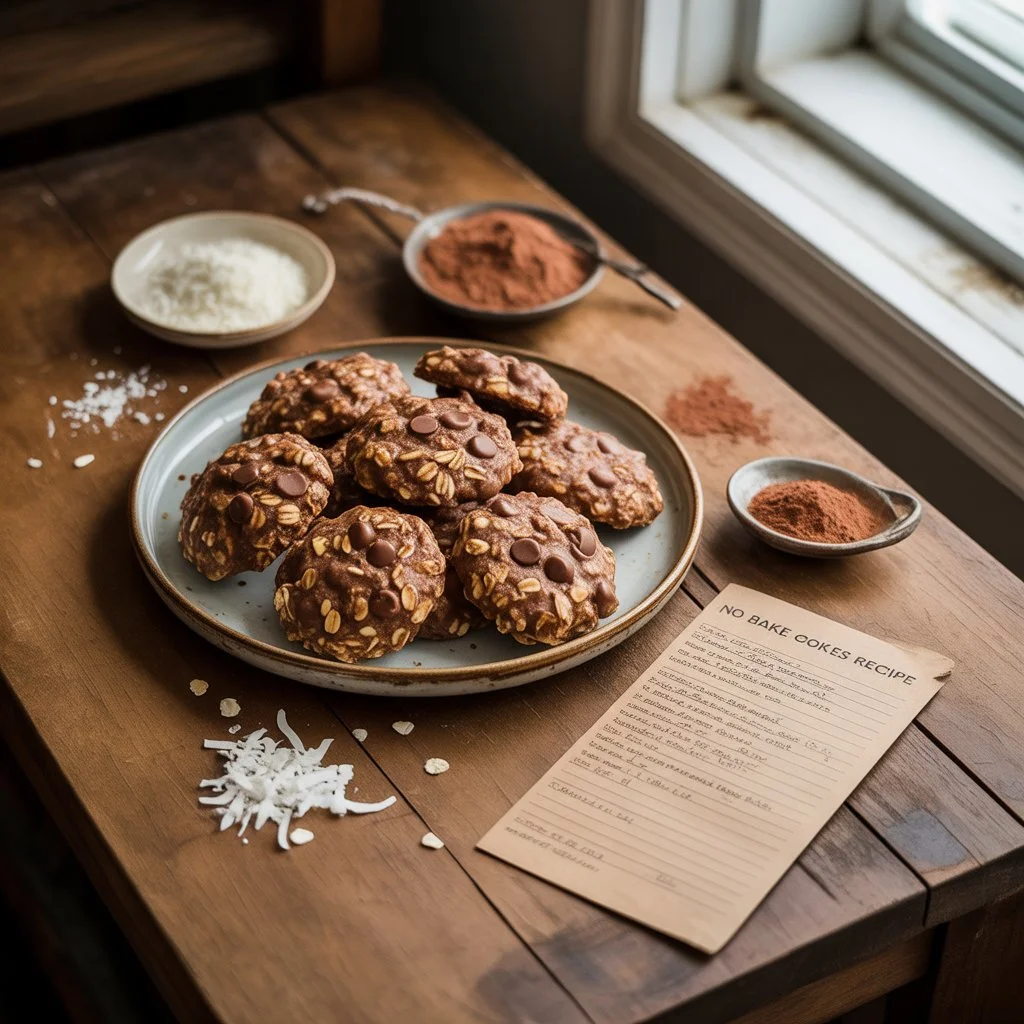
These cookies hit all the right notes. They’re chewy, rich, and slightly fudgy with a melt-in-your-mouth finish. You get chocolate, peanut butter, and oats in every bite — no oven, no baking sheet, no waiting for preheat.
The recipe uses just one pot. Cleanup is quick. Cooking time? Less than 15 minutes.
This makes them perfect for beginners, busy parents, or anyone who wants a fast treat. Kids love the taste. Adults love the nostalgia.
You can freeze them or store them for days. They’re a solid pick for lunchbox snacks, weeknight cravings, or holiday platters.
Here’s what you need to make these classic no bake cookies:
Stick with pantry staples. No fancy extras. Just a tight list that works every time.
Both work, but they give different results.
For kids or smaller portions, use quick oats. For a chunkier feel, go with old-fashioned.
Tip: Don’t use steel-cut oats. They stay too hard, even after cooling.
Yes — but you need a smooth swap. Try sunflower seed butter, almond butter, or cashew butter for a peanut-free version. These all give similar creaminess without the allergy risk. Use creamy types, not crunchy, or the cookies might fall apart.
Avoid natural peanut butter unless it’s fully stirred. Too much oil or separation can ruin the texture.
You don’t need cow’s milk. Almond, oat, and soy milk all work well. Just use the unsweetened kind so your cookies aren’t too sweet. Stick to ½ cup for best results.
Avoid coconut milk unless you want a bold coconut flavor. It changes both taste and texture.
Cutting sugar? You can try monk fruit sweetener, erythritol, or allulose blends. But there’s a catch — these don’t boil the same way as regular sugar.
Watch the texture closely. Don’t rely on the clock. You want a thick, glossy syrup before adding oats.
Just know: the final cookie may set softer, grainer, or a little sticky. Traditional sugar gives the best chew and hold.
Start with a medium saucepan over medium heat. Add the butter, granulated sugar, milk (dairy or unsweetened non-dairy), and unsweetened cocoa powder. Stir constantly until the butter melts fully and everything blends into a smooth, chocolatey mixture.
Once smooth, bring the mixture to a full rolling boil — this means big bubbles rising across the entire surface, not just little ones at the edges.
The second you see that hard boil, set a timer for exactly 60 seconds. This part is non-negotiable — it’s what makes or breaks the cookie texture.
Why It Matters:
Timing is key to get that classic fudgy-chewy texture found in the best chocolate no bake cookie recipe versions.
Once the 60 seconds are up, remove the pan from the heat. Add the creamy peanut butter right away — it should melt into the hot chocolate mixture easily. Stir until fully smooth and combined.
Next, add vanilla extract and your quick oats (or old-fashioned oats). Stir fast and thoroughly. Every oat should be coated — you’re aiming for a thick, glossy mixture that holds its shape.
No dry clumps. No soupy pools. Just shiny, scoopable cookie dough.
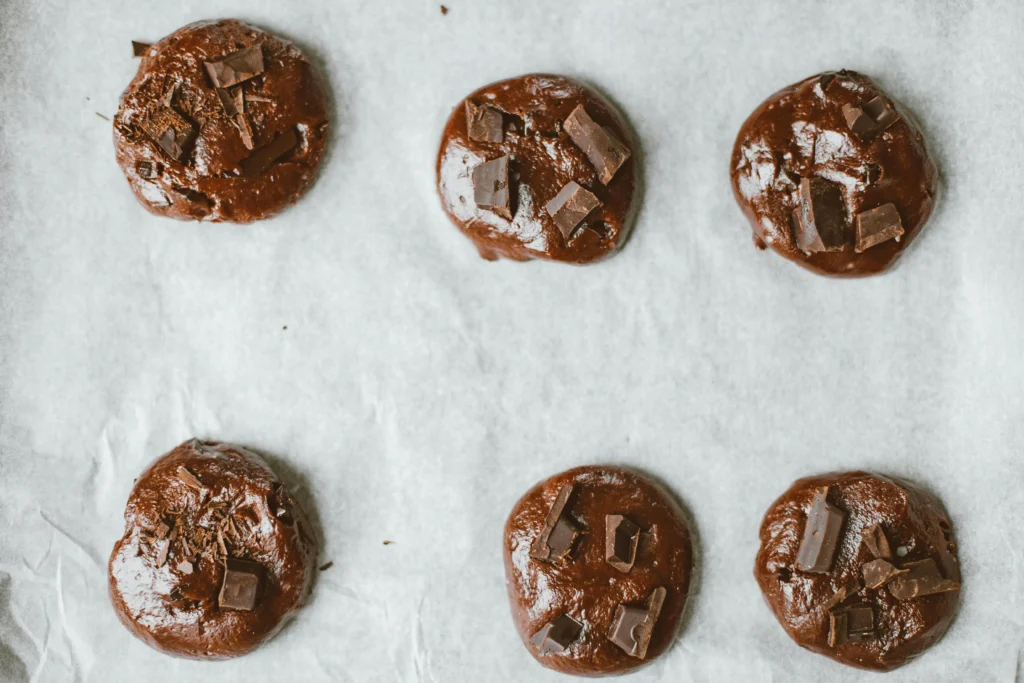
Lay out a sheet of wax paper or parchment paper on your counter or baking tray.
Use a cookie scoop, spoon, or tablespoon to drop mounds of the mixture. Try to keep them uniform in size — about 1.5 to 2 tablespoons each works best.
You don’t need to press them or shape them perfectly. They’ll settle naturally as they cool.
Tip: Want perfect circles? Lightly tap the tops with a spoon while warm — but don’t press too hard or they’ll flatten too much.
Let your cookies rest at room temperature for about 20 to 30 minutes. As they cool, they’ll firm up and hold their shape.
If you’re in a hurry, pop the tray into the fridge for 10–15 minutes. That speeds things up without changing texture.
Once set, you’ve got perfect no bake oatmeal cookies — chewy, rich, and ready to eat.
Quick Overview (Printable Recipe Card)
Ingredients:
Instructions:
Prep Time: 5 minutes
Cook Time: 5 minutes
Set Time: 20 minutes
Total Time: 30 minutes
Yield: 24 cookies
Nutrition (Per Cookie):
Calculated using standard ingredients; actual may vary

When it comes to making the perfect no bake oatmeal cookies recipe, the type of oats you use can make or break your final texture. Not all oats behave the same — here’s what you need to know:
Quick oats are the gold standard. They’re pre-cooked and flattened, so they absorb the chocolate mixture quickly and create that soft, cohesive texture these cookies are known for. If you want cookies that set evenly and melt in your mouth, quick oats are the way to go.
If you prefer a heartier bite and a bit more chew, go with rolled oats. They’re less processed and keep their shape better, giving you chunkier cookies. Some people love the added texture and rustic feel they bring. These also work well if you’re aiming for a slightly less sweet profile, as they balance the fudgy base.
Steel-cut oats are too dense and minimally processed. They stay hard, even after cooling, and won’t soften up in the hot mixture. The result? Tough, chewy cookies that feel undercooked.
Nailed the ingredients but still having trouble with setting, texture, or flavor? These test-kitchen-approved tips will help you troubleshoot and perfect your chocolate no bake cookie recipe every single time.
The number one reason for failed cookies is incorrect boiling time.
✅ Pro Tip: Use a kitchen timer or your phone. Start counting only when the mixture hits a full rolling boil — large bubbles rising and popping all over the surface. That’s when the sugar is hot enough to bind properly.
Too Sticky or Loose?
Too Dry or Crumbly?
Greasy or Separated?
There’s nothing worse than biting into a cookie and feeling sugar crystals. Here’s how to avoid it:
Best Sugar to Use:
Humidity can mess with the set. On rainy days, your cookies may need extra set time or fridge help.
If your kitchen is hot, they may stay soft. Chill the mix briefly before scooping to fix that.
Here’s your next set of sections, written to outperform competitors and satisfy AI Overview triggers while maintaining:
These cookies hold up well on the counter. Keep them in an airtight container. They stay fresh for 4 to 5 days.
For longer shelf life, move them to the fridge. They’ll stay good for up to 2 weeks. The cold firms them up and keeps them chewy.
Want to keep them even longer? Freeze them. Layer cookies with wax paper in a sealed container or freezer bag. They’ll stay fresh for up to 3 months.
Use airtight plastic or glass containers. If stacking, place parchment between layers to stop sticking.
Yes. You can prep a full batch the night before. Let them cool, then cover and store. They’ll be ready to go the next day — no loss in flavor.
From fridge: Let them sit at room temp for 10 minutes.
From freezer: Let thaw for 30–40 minutes uncovered. Don’t microwave — it can ruin the texture.
Melt white chocolate chips. Drizzle over cooled cookies with a spoon or piping bag. It adds a sweet contrast to the cocoa base.
Right after scooping, add a light pinch of flaky sea salt. It boosts the flavor and cuts the sweetness.
Mix in ¼ cup of shredded coconut for a tropical vibe.
Fold in mini marshmallows after the oats for a rocky road version.
Add 1–2 tablespoons of vanilla or chocolate protein powder with the oats. This works best with whey or pea protein. Adjust oats slightly if needed.
Use plant-based butter, almond or oat milk, and natural peanut butter. Stick with quick oats and double-check all ingredients for dairy-free labels.
If you skip the full boil or time it wrong, the cookies won’t set. Always boil for 60 seconds once the bubbles roll across the surface.
Natural peanut butter separates. It can make the cookies oily or loose. If using it, stir well and reduce the butter slightly.
Even a pinch of salt makes a difference. Vanilla pulls the flavor together. Don’t skip either — the taste will fall flat.
You may have boiled the sugar for too short a time. Use a timer and wait for a full rolling boil before starting the countdown.
Yes. Freeze in layers using parchment. They’ll last up to 3 months and taste just as good after thawing.
Yes. They make the cookies more textured. If you prefer a smooth finish, use quick oats instead.
They can be. Use certified gluten-free oats and double-check your other ingredients.
You can, but you’ll need a replacement. Use sunflower seed butter or almond butter for best results.
Yes — just double everything, including the boil time to about 90 seconds. Stir fast and work quickly to scoop before it thickens.
Want to make more? You can double or triple the ingredients. Use a larger pot to prevent spillover. Remember to stir quickly — the mix sets fast.
At room temp: up to 5 days
In the fridge: 2 weeks
In the freezer: 3 months
Once cooled, wrap each cookie in wax paper or place them in festive treat bags. Add a label with storage tips. They make perfect DIY gifts for birthdays, Christmas, or bake sales.
Here’s the final batch of your content, written in your preferred tone — natural, structured, and optimized for reader engagement and AI visibility. All keywords are subtly integrated without disrupting flow.
Serve these chewy cookies alongside a warm mug of cocoa. It’s the perfect cozy pairing for chilly days or late-night snacks.
Break them up and sprinkle over vanilla, chocolate, or peanut butter ice cream. Instant sundae magic — no syrup needed.
Wrap them individually and add them to lunchboxes. They’re mess-free, no refrigeration required, and totally kid-approved.
Add these cookies to your holiday dessert spread. Pair with fudge, peppermint bark, or snowball cookies for a festive display.
No special tools required. Most of these are already in your kitchen.
Explore more no-bake and oatmeal-style treats that match your taste:
Use internal links here to boost site structure and dwell time. Add “Related Posts” widget for extra engagement.
This no bake cookies recipe checks every box. It’s fast. It’s foolproof. It’s full of flavor.
Chocolate and peanut butter are always a win. Add oats, and you’ve got a chewy, rich texture that keeps people coming back.
It’s great for busy nights, last-minute treats, or anytime your oven’s off-limits.
Want to try a twist? Add your favorite extras. Coconut, protein powder, or a sprinkle of sea salt — make it yours.
Want a heartier main course option? Try our Juicy Homemade Hamburger Recipe — packed with flavor and perfect for cookouts or casual dinners.


")


")